
In many lab sessions, the biggest teaching problem is also the simplest one: only a few students can see clearly at the right moment.
The teacher focuses the microscope, points out a structure, and explains what matters. But unless every student can see that same specimen at the same time, the explanation loses value. Students wait, crowd around, or depend on notes instead of direct observation. In practical-heavy environments, that slows learning and weakens discussion.
That is where a smart board for the classroom in labs starts to make real sense.
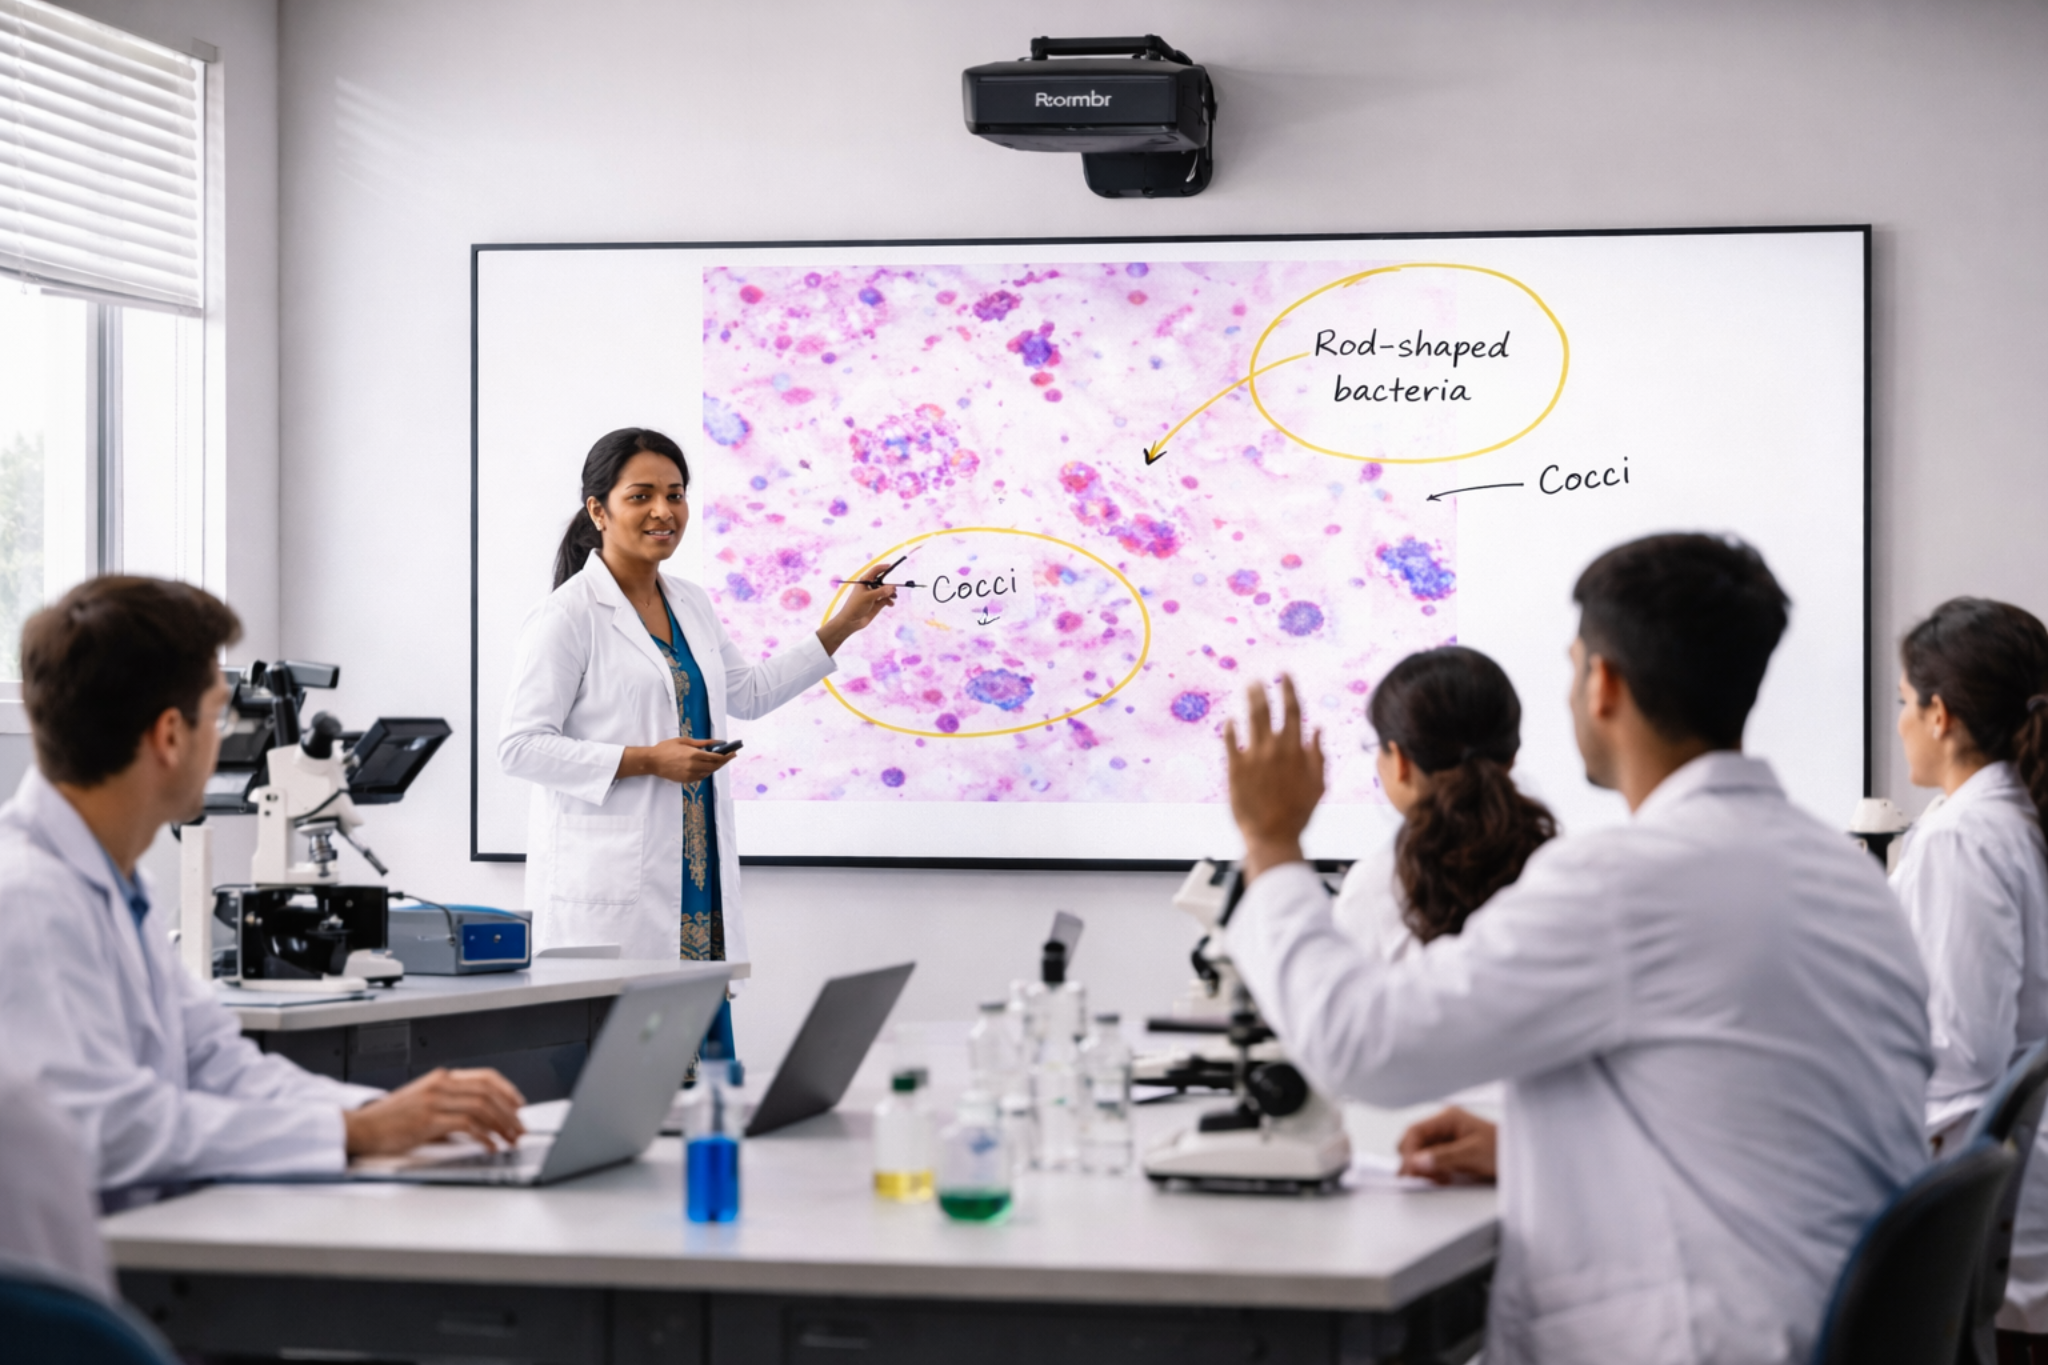
This is not just about putting a large screen in a room. In biology, nursing, and allied health labs, the right setup can turn a microscope view into a shared visual lesson. Instead of one learner seeing the slide and others trying to catch up, the class can observe, compare, annotate, and discuss the same specimen together. That shift matters because current biology and health sciences curricula in India continue to emphasize experiential learning, observation, practical work, microbiology, specimen handling, staining, and lab-based competence.
So how should an institution evaluate this properly?
Not every display is suitable for microscope-based teaching. Not every vendor understands lab workflows. And not every buying decision that looks good in a demo will work well in day-to-day sessions.
This guide explains what institutions should check before investing in a smart board for classroom environments inside a lab.
Why Digital Microscope Integration Matters in Lab Teaching
Biology Labs Are Built Around Visual Understanding
Biology is not taught well through description alone. Students need to identify structures, compare specimens, understand differences in staining, and connect what they see to what they are learning in theory.
A smart board for a classroom becomes valuable in this setting because it helps the teacher move from individual viewing to collective explanation. One prepared slide can become a full-class teaching moment.
Nursing Labs Need Clearer Demonstration, Not Just More Equipment
Nursing institutions often think first about simulation, mannequins, and skills labs. Those matters. But microbiology and infection-control learning also depend on visual explanation. The current B.Sc. Nursing curriculum includes Applied Microbiology and Infection Control with practical, lab/experiential learning. It also covers identifying microorganisms, types of staining such as Gram and AFB, culture media, and demonstration-led learning.
That means the right interactive board for teaching in a nursing lab can support stronger demonstration of what students are actually expected to recognize and discuss.
Allied Health Programs Rely Heavily On Microscope-Led Competence
For allied health and medical laboratory science programs, this matters even more. The NCAHP Medical Laboratory Sciences curriculum includes microscope-related knowledge, Gram staining, identifying parasites under a microscope, histology, cytology, tissue identification, staining techniques, and even digital microscope infrastructure in the equipment list.
In other words, microscopy is not peripheral in these programs. It is part of core skill development. The decision to invest in a smart board for a classroom, therefore, should be evaluated through the lens of practical teaching performance, not general AV specs alone.
What Microscope Integration Means
A lot of institutions say they want microscope integration, but the term is often used too loosely.
In practice, microscope integration usually includes four parts:
- A microscope
- A camera or imaging attachment
- Software or an app for viewing and managing the image
- A large interactive display or classroom screen for teaching
The goal is not only to show a larger image. The better teaching setups allow faculty to display live images, annotate them, capture screenshots, compare two views, archive images, and, in some cases, share them across connected devices.
Digital classroom microscopy today is no longer limited to simple screen projection. In practical teaching environments, institutions increasingly look for setups that do more than passively display microscope images. Features like live viewing, annotation, image capture, saving, sharing, and smoother classroom discussion make the setup far more useful for real lab teaching.
That distinction matters.
A microscope image on a large screen is useful. But a microscope image that can be labeled, saved, revisited, and discussed in real time is much more useful.
Where a Smart Board Setup Adds the Most Value
The best use cases are not theoretical. They show up in routine lab sessions.
In Biology Labs
A faculty member may need to explain:
- Tissue sections
- Plant and animal cell differences
- Blood smear observations
- Bacterial forms
- Stained specimen interpretation
- Structure labeling during discussion
With a smart board for a classroom, the faculty member can display the live image, zoom in or switch views when needed, and mark the structure students should notice. That reduces repetition and makes the explanation more consistent across sections.
In Nursing Labs
A faculty member may need to introduce students to:
- Microorganism identification basics
- Staining demonstrations
- Specimen handling discussion
- Infection-control relevance
- Differences between normal, contaminated, and problematic samples
Here, an interactive display helps turn what would otherwise be a small-group viewing exercise into a shared instructor-led lesson. It also helps when class sizes are large and demonstration time is limited.
In Allied Health and Medical Lab Environments
Programs in pathology, histology, microbiology, hematology, and cytology often require repeated practical demonstrations.
For example, if 30 students need to view a specimen and only five can gather comfortably around one station at a time, the same explanation may need to be repeated several times. A digital smart board in a classroom can reduce that repetition by turning one microscope view into a whole-class explanation, followed by more focused individual practice.
That does not replace hands-on microscope work. It improves the teaching sequence around it.
What to Check Before Buying
This is the most important part of the decision.
A smart board for a classroom in a lab should be judged by teaching workflow, not by marketing language.
This is also where institutions comparing interactive panels for education often make a mistake: they compare size, brightness, and price first, then think about microscope workflow later. For lab use, that order should be reversed.
Common Buying Mistakes Institutions Should Avoid
1. Choosing the Display First and the Workflow Second
The display is only one part of the chain. If the camera connection, software path, or faculty workflow is weak, even a premium screen will feel underused.
2. Asking for a Showroom Demo Instead of a Lab Demo
A normal sales demo tells you very little about real performance. Ask vendors to show:
- A live specimen
- Real-time annotation
- Source switching
- Image save/export
- Clarity from the last row
3. Ignoring the Teacher’s Daily Experience
If faculty need five to seven steps every time they start a session, usage will drop. Convenience matters.
4. Treating All Departments the Same
A biology lab, nursing lab, and pathology teaching room may all need visual technology, but their workflows are not identical. The buying conversation should reflect that.
5. Assuming Visibility Alone Solves the Problem
Visibility helps. But the real value comes when the screen supports explanation, comparison, discussion, and recall.
Questions to Ask Vendors Before You Shortlist
Use this list during evaluation.
- Can your solution display live microscope output from our existing setup?
- What camera, adapter, or software path is required?
- Can teachers annotate directly on the live image?
- Can images be saved for revision or later discussion?
- Can two images or inputs be compared side by side?
- Do we need a separate PC every time?
- How long does it take to start a session from scratch?
- What training do you provide for faculty?
- What support is available after installation?
For institutions reviewing multiple interactive panels for education, these questions are often more useful than a generic feature sheet.
A Practical Buying Framework for Decision-Makers
If you want a cleaner evaluation process, use this sequence:
Step 1: Define the Teaching Use Case
Are you mainly solving for:
- Live specimen explanation
- Group visibility
- Annotation
- Revision support
- Multi-batch teaching consistency
Step 2: Audit Your Current Microscope Setup
Check:
- Available outputs
- Camera attachments
- Current software
- Whether the faculty already captures images
- How sessions are run today
Step 3: Identify the Real Bottleneck
Is the problem:
- Too many students around one microscope
- Poor explanation visibility
- No saved examples for revision
- Inconsistent teaching across batches
- Too much time lost in setup
Step 4: Run a Real Classroom Test
Do not make a buying decision based only on brochure claims. Test the workflow with a real specimen, a real teacher, and a real room.
Step 5: Compare Total Usability, Not Just Quoted Cost
The cheapest solution is not always the lowest-cost decision over time. If adoption is weak, the institution will not get the teaching value it expected.
That is why many institutions looking for a smart board for the classroom should evaluate usability, workflow fit, and support quality alongside the quoted hardware cost.
Institutions that also want to compare price-related factors in more detail can explore our smart board price comparison guide.
Final Thoughts
A smart board for classroom use in labs is not automatically a smart investment just because it is large, modern, or interactive.
It becomes a good investment when it solves a real teaching problem.
In biology, nursing, and allied health environments, that problem is often shared visibility. Students need to see what the teacher sees. Faculty need to explain practical details clearly. Departments need tools that support discussion, annotation, consistency, and better use of limited lab time.
That is why the best buying decision is rarely about the board alone. It is about the full visual teaching workflow around it.
If your institution is evaluating an interactive display or digital smart board for classroom environments in lab-heavy departments, start with the teaching sequence, not the screen specification. The right solution should fit the way your faculty teach, the way your students learn, and the way your labs are used.
Frequently Asked Questions
1. Can a smart board for the classroom connect directly to a microscope?
Usually, the connection happens through a camera, imaging attachment, software layer, or output interface rather than the microscope alone. The exact path depends on the microscope setup.
2. Is this useful only for medical colleges?
No. It can also be useful in biology labs, nursing institutions, and allied health programs where practical visual teaching is central to the class.
3. What matters most in a lab-ready interactive board for teaching?
The most important factors are compatibility, image clarity, live annotation, ease of use, image-saving ability, and faculty adoption.
4. Can microscope-based sessions be saved for revision?
Many digital microscopy teaching workflows support image capture, annotation, archiving, and sharing, which can be useful for revision and teaching continuity.
5. Should nursing colleges care about this setup?
Yes. It can make microbiology and other practical teaching sessions easier to explain because the whole class can view the same specimen clearly at the same time.
Plan a Smarter Visual Teaching Setup for Your Lab
If your school, nursing college, or allied health institution is exploring a smart board for classroom use in lab-led teaching spaces, Roombr can help you evaluate the setup in a more practical way. Instead of looking only at screen size or hardware specs, we help institutions think through real teaching needs such as visibility, live explanation, interaction, and classroom flow.
To make that evaluation easier, Roombr also offers on-site demos, so your team can see how the solution works in an actual learning environment. In addition, we provide complimentary 1-week access to Roombr’s all-in-one edtech solution, giving your faculty and administrators the chance to use it in their own setting, with their own workflows, before making a decision. That way, you can assess what fits your lab teaching needs with more confidence.
Book an on-site demo with Roombr to see how it can work in your lab environment.

Foziya Abuwala
Share
Step Into the future of
Education with Roombr